site documentation
![]()
Hey all! This is going to be a longer post, but consider it essential and necessary. Plus, who wouldn’t want to read a ton of what Nate writes???
So, what’s going on?
I decided to re-consider the steps I’ve taken thus far when it comes to the online form of the Manual. First, I realized that though WikiMedia is a great platform (I mean, it runs the best site on Earth), it is still a really different platform. To properly use it we would all need to learn how to use a special markup language. Plus, the site is pretty slow and it wouldn’t lend itself to simple deployments to the final site.
Note Don’t worry! This page will be edited before we release anything so we aren’t too unprofessional ;)
Instead, I figured that it would be best to look at POM when it comes to the platform:
overview
Purpose, Outcomes, and Methods
Purpose: To easily and effectively communicate the CultureBridge project to site visitors.
Outcomes:
- Portability: a site which can last forever with very little maintenance. This really means:
- Universal input: a form of writing which is well-supported across the web.
- Universal output: a static site (plain HTML, CSS, & JS) - which can be run from files on your computer or a website
- Multi-format: the ability to download the entire site in or convert the entire site to HTML, PDF, markdown, etc.
- Ease-of-use: both for the end-user and for us – the writers. The website should be easy to navigate. We need something which is easy to learn how to use.
- Beautiful: the simple fact is, a beautiful site which focuses on content is better for the situation. Version control: a permanent record of changes and additions (not just for us, but for future creators).
Methods: Well, here we are! The following is meant to introduce you to what comes next and how you can use it.
the site
You are here! For now, we can use culturebridge.ga as the website. But no worries, it would be as simple as 1 … 2 … and 3 to change it.
the layout
Mobile Layout
There are two “menus” you have to know about. First, the actual menu. This is the three bars in the top left. Click on it and you will see a big “CultureBridge Tulsa”, a search input, and a Table of Contents. The search function is still a work-in-progress, so it may or may not work.
The table of contents you see here is site-wide. It links to all of the major pages. Think of these as chapters in a book.
Did you know? The theme of our site is actually called “Hugo Book”. How appropriate!
You should see the Modules section, the Supplements section, and an Info section. These will be the major parts of the site. One day you will be able to click on “Modules” and see a page explaining what the modules are and linking to all of them. Or, you could jump right in and go to the Module you want (go ahead! try looking at the Debrief or Intro).
The same thing will happen with the Supplements and the Info section.
That’s all pretty standard. The other menu (found on the top right) is the specific page’s Table of Contents. This TOC is generated by the headings you use in the page. Take a look at the one on this page to see how it is.
Note: Not every page will have one of these! We can disable them on a page-by-page basis – which you’ll learn how to do later.
That’s about it for the layout! In case you are wondering, these are the fonts we are using:
- Charter for normal text (this is that font),
Fira Mono for code, and-
Fira Sans for menus, headers, and special call-outs
Desktop Layout
For everyone reading this on a computer, I might as well come out and say it: I love you.
Why? Because the web is just so much better on a big screen. Why do we limit ourselves to tiny little things which make life so much harder for programmers and designers?
So, I’m not going to waste your time here. On a computer it’s much easier to see the Menu and the single-page Table of Contents. Everything is pretty intuitive. But if you’re curious, go ahead and switch over to the “Mobile” tab to read about it all.
Love you, Nate
Netlify CMS
I’m jumping ahead to this section cause it’s the most necessary. The Markdown section is also somethat important, if you want to be cool, but it’s not strictly necessary, as you will see in this section.
What is Netlify CMS?
A CMS is a “Content Management System”. In other words, it’s a system which helps us manage our content. Or, in even different other words, it’s a thing we will use to write, edit, style, and “push” each page on the site.
In summary, these are the instructions for how you will make content on this site.
making your account
Whoa! An account! Get excited everyone, this is where it gets fun. It’s also where you need to be using a computer, not a phone :)
First, go to culturebridge.ga/admin/. Click on the “Login with Netlify Identity”. Move to the “Sign up” tab. You can either:
- Use a name, email, and password, or
- Use Google to login (or GitHub, GitLab, and BitBucket).
Second, make sure you check the appropriate email to confirm your account.
Right now registration is open to anyone (but only meant for you all). Soon, I will close registration to make it invite-only.
Third, login with that account.
the simple tour
Next, you should see something a little like this:
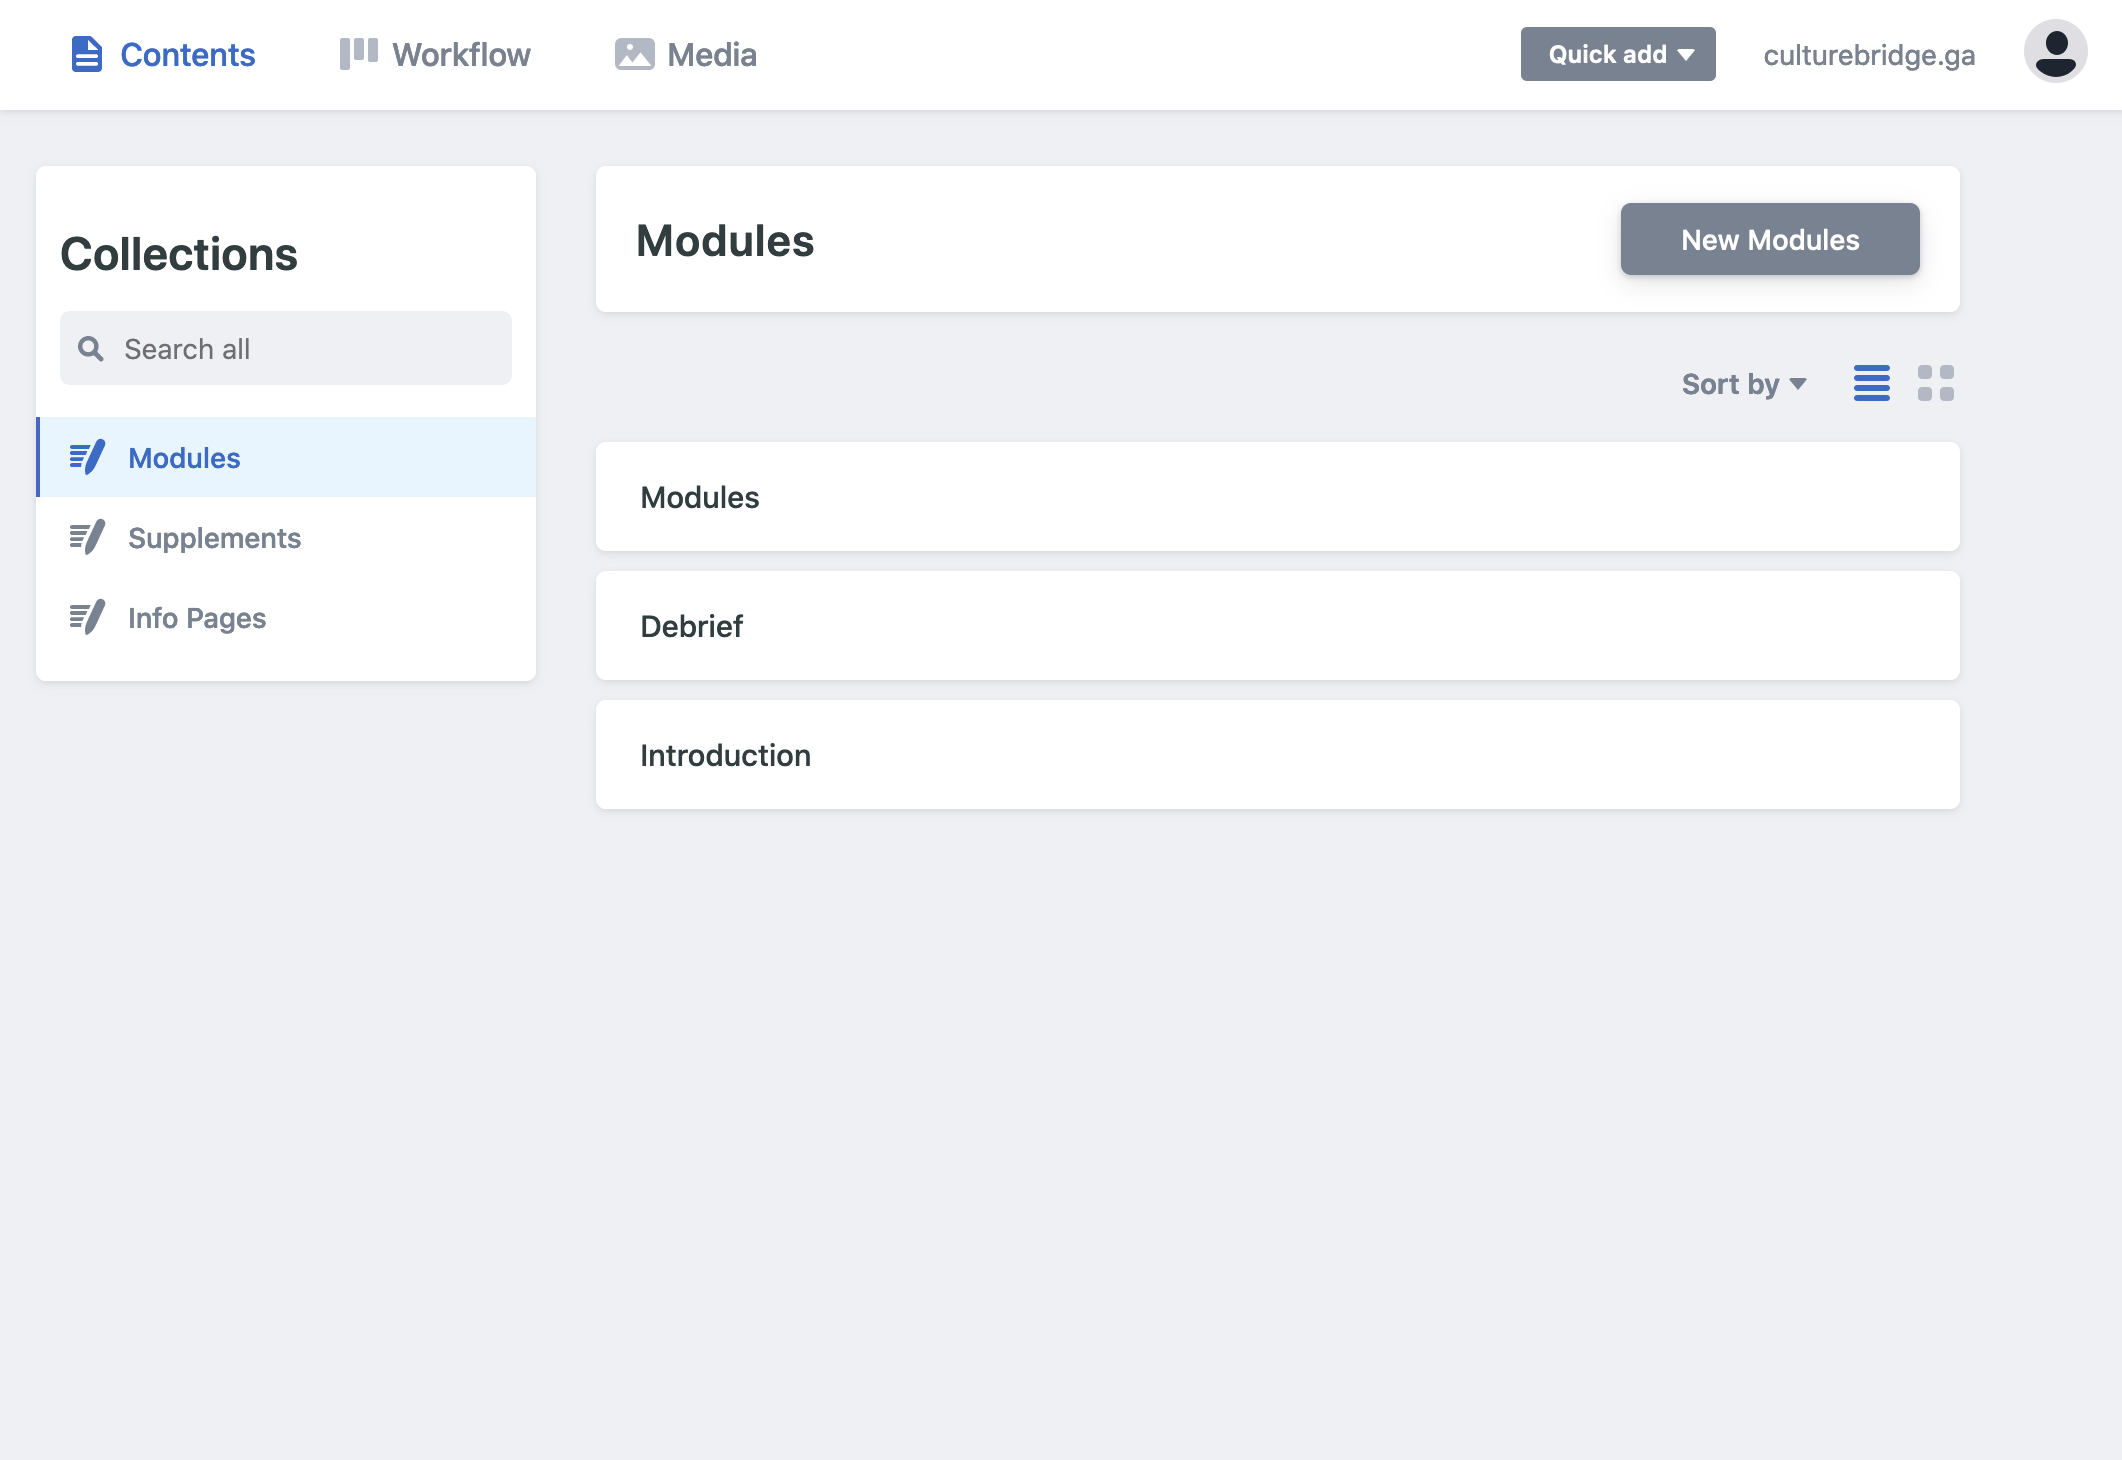
On the left are the three sections open for you to edit (i.e. Modules, Supplements, and Info). Clicking on these will show you the pages within that. The page which is named after the Section (e.g. Modules in the Module section) is the “home” page for that section.
Now, let’s take you on a small tour. Click on “Debrief”. After a few seconds of loading, you should see something like this:
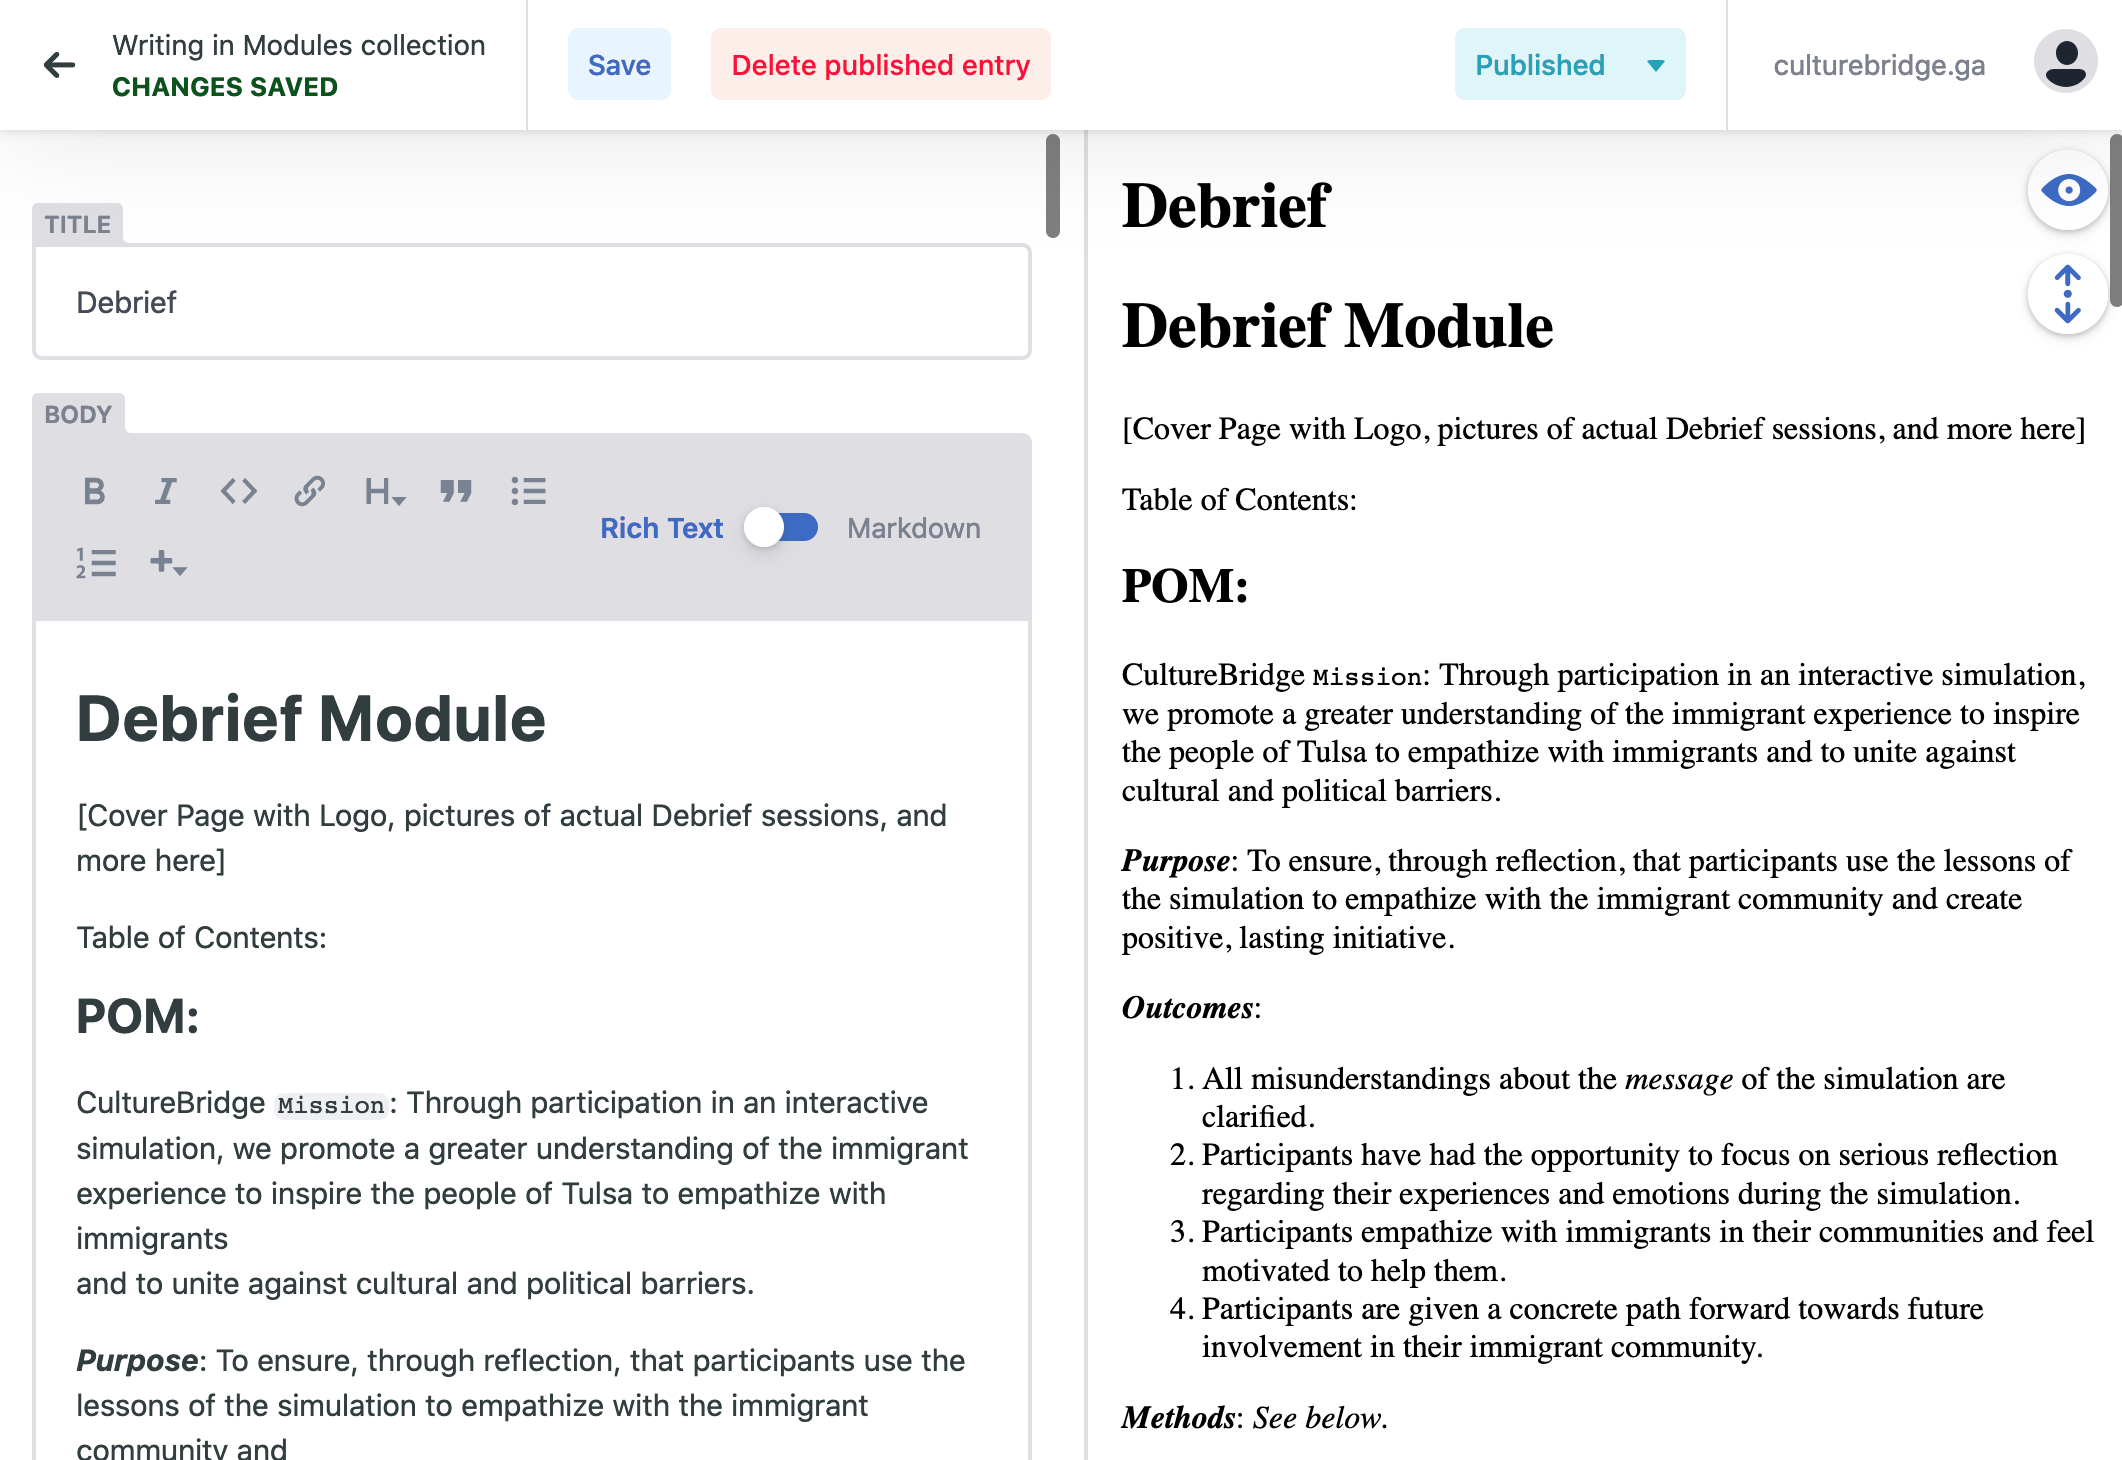
On the left is a text editor, and on the right is a plain HTML preview of what it would look like (but un-styled). You can disable the preview on the right by clicking on the eye symbol in the top right. Now, you’ll see something like this:
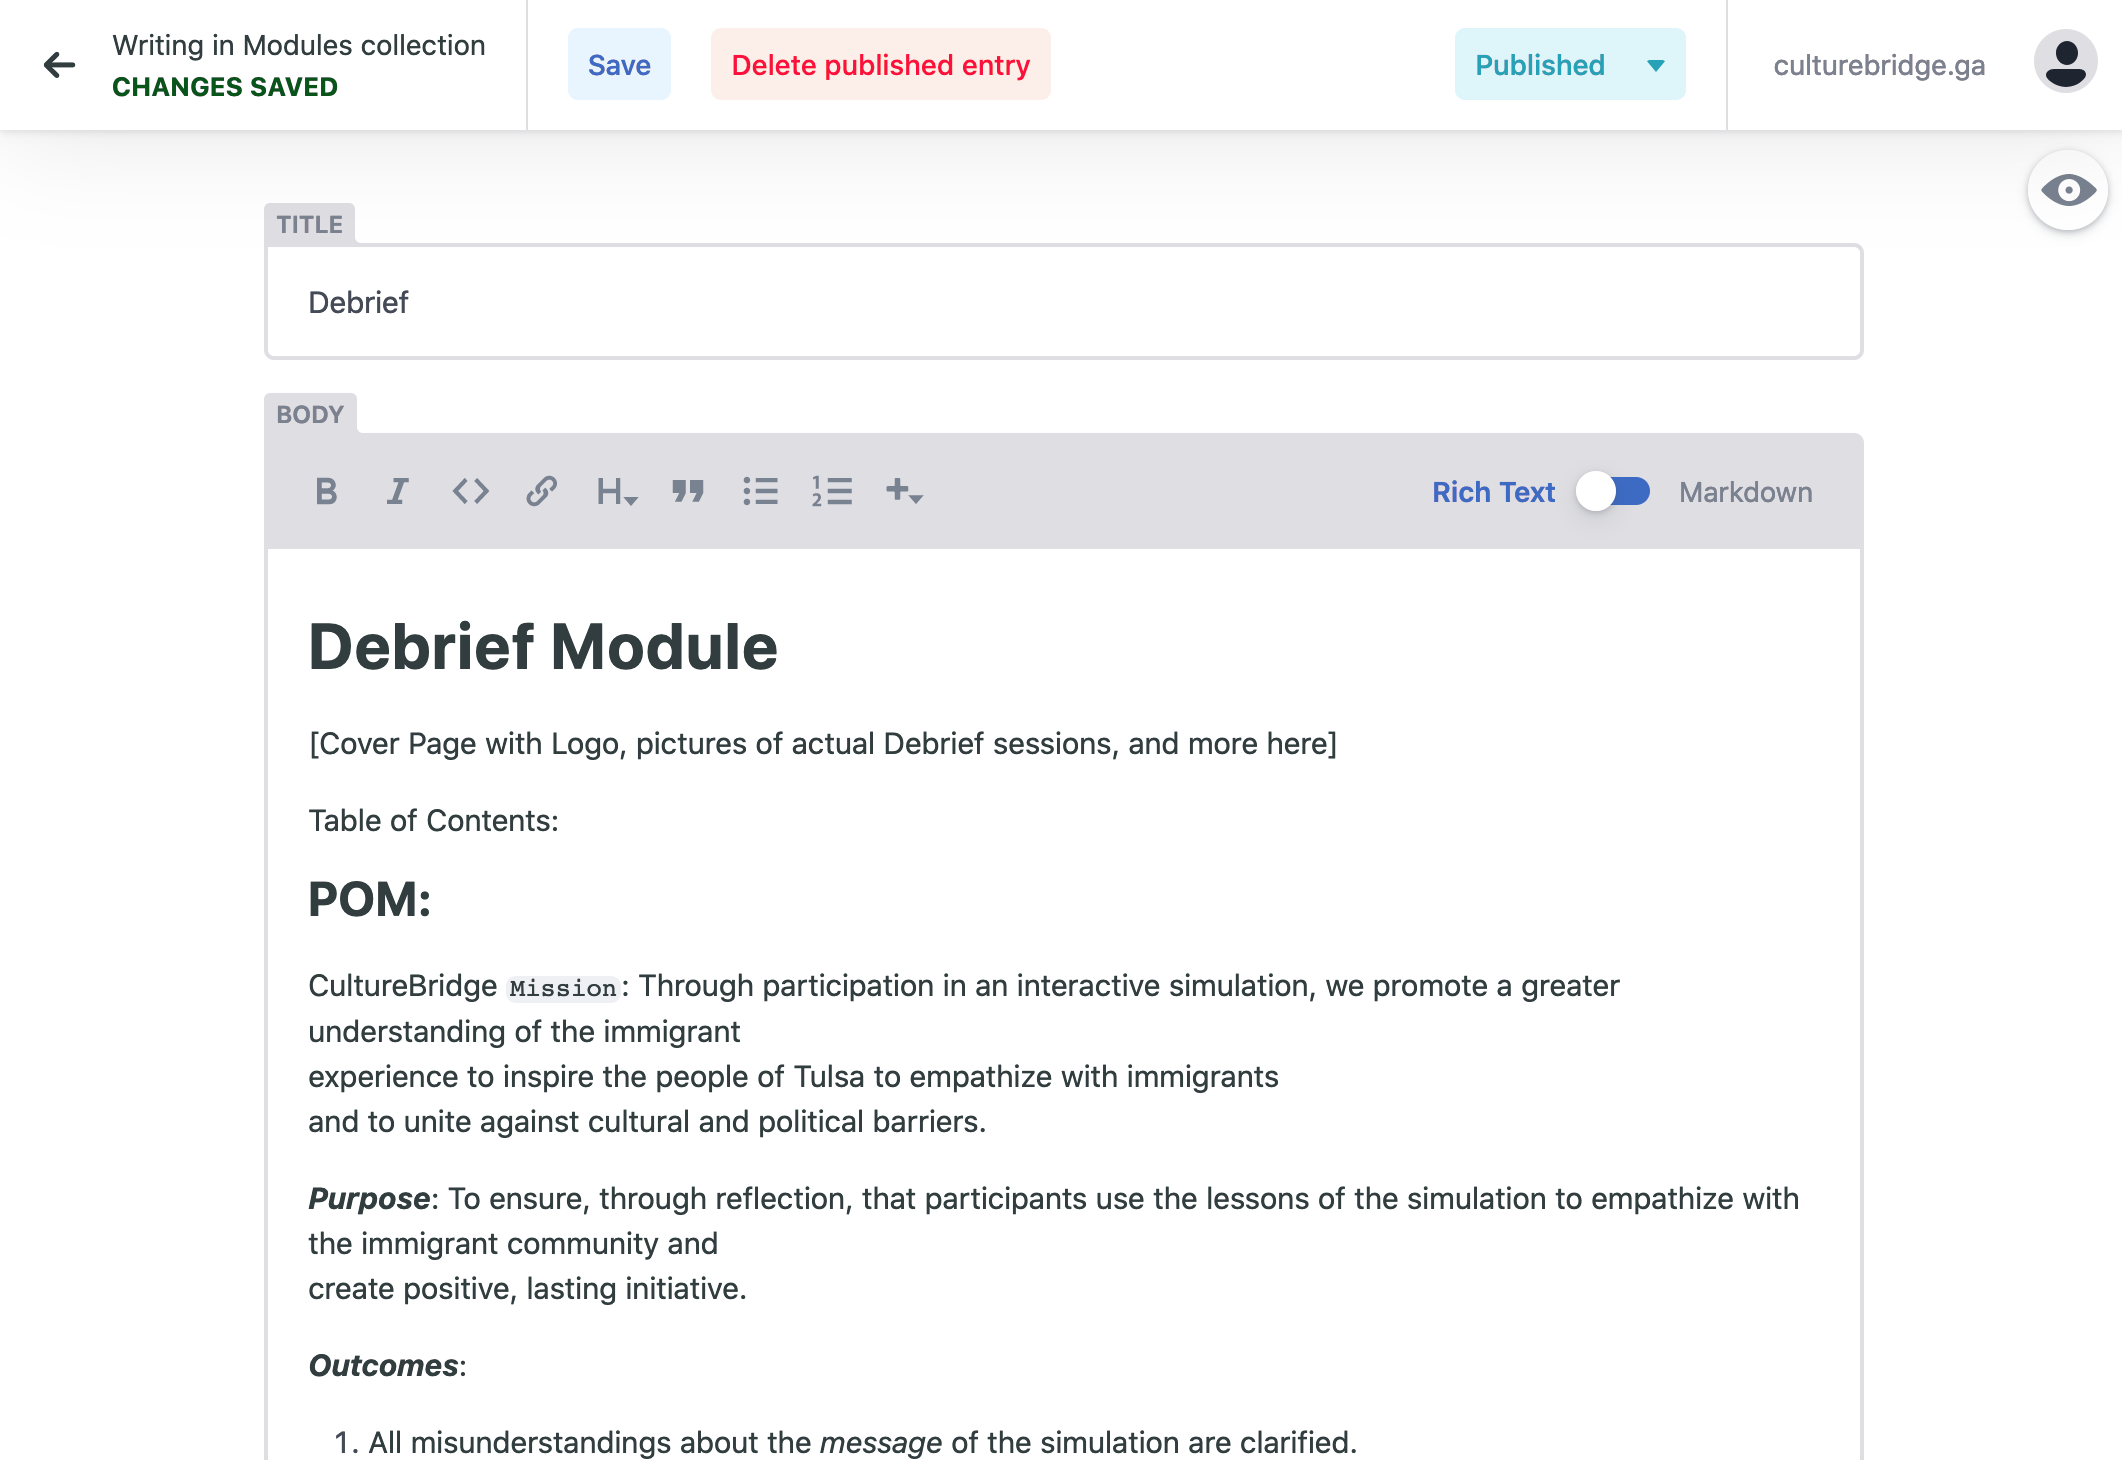
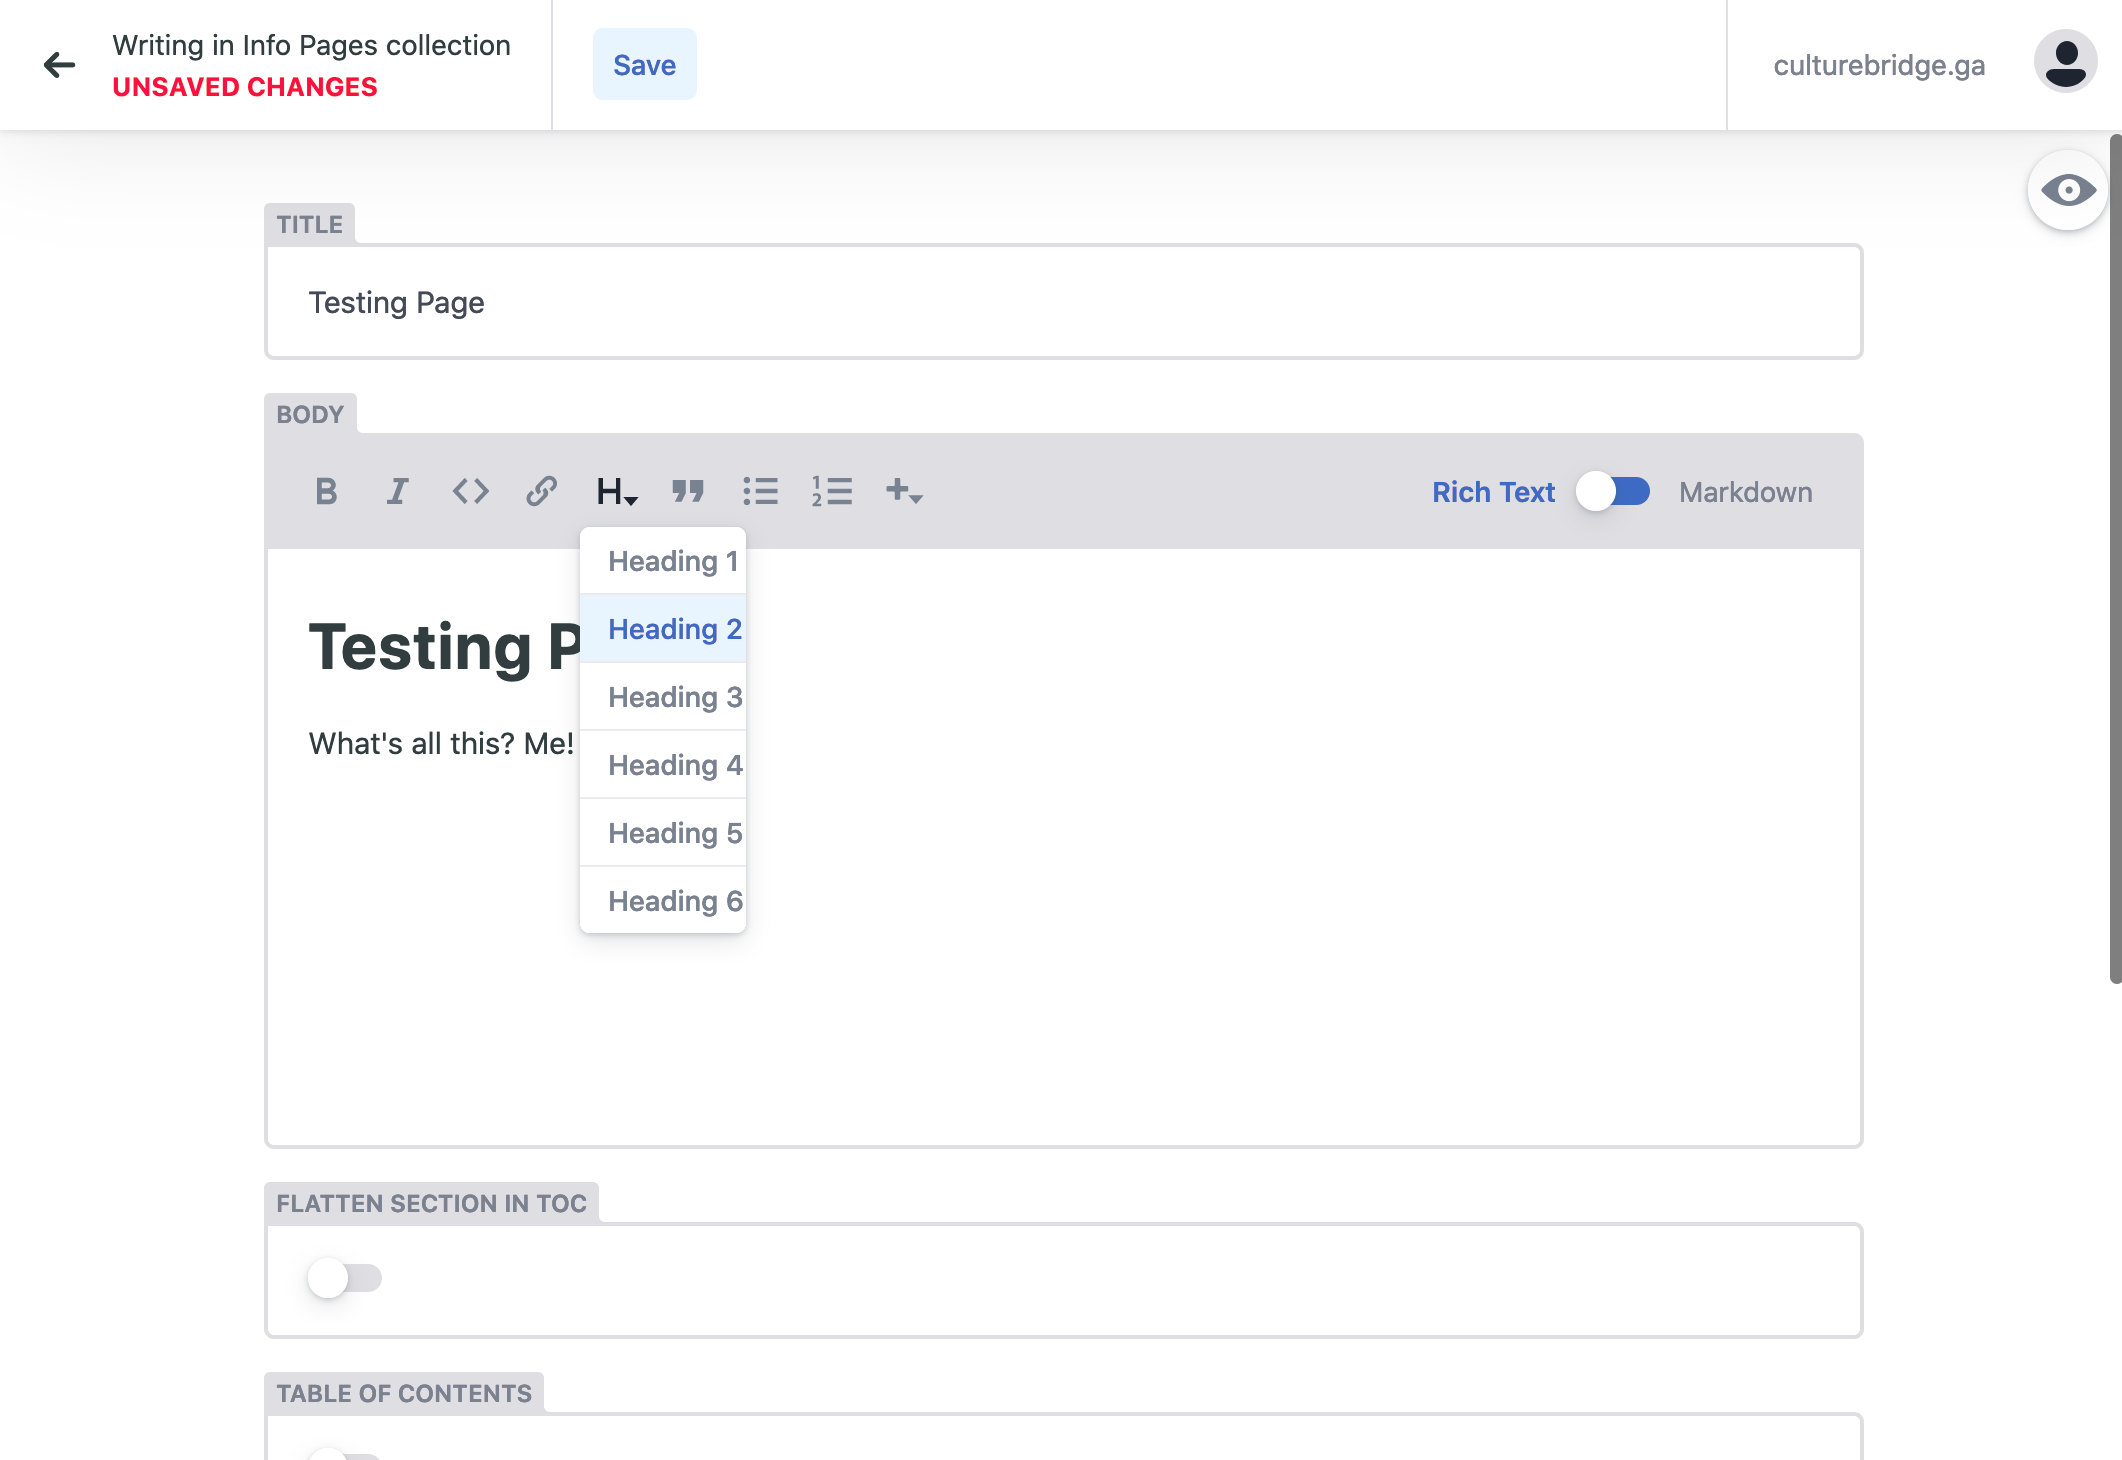
Now, pay special attention to the toggle which says Rich Text and Markdown. The Rich Text version is like any WYSIWYG (“What You See Is What You Get”) editor. You format it like you would anywhere. Now try the Markdown view:
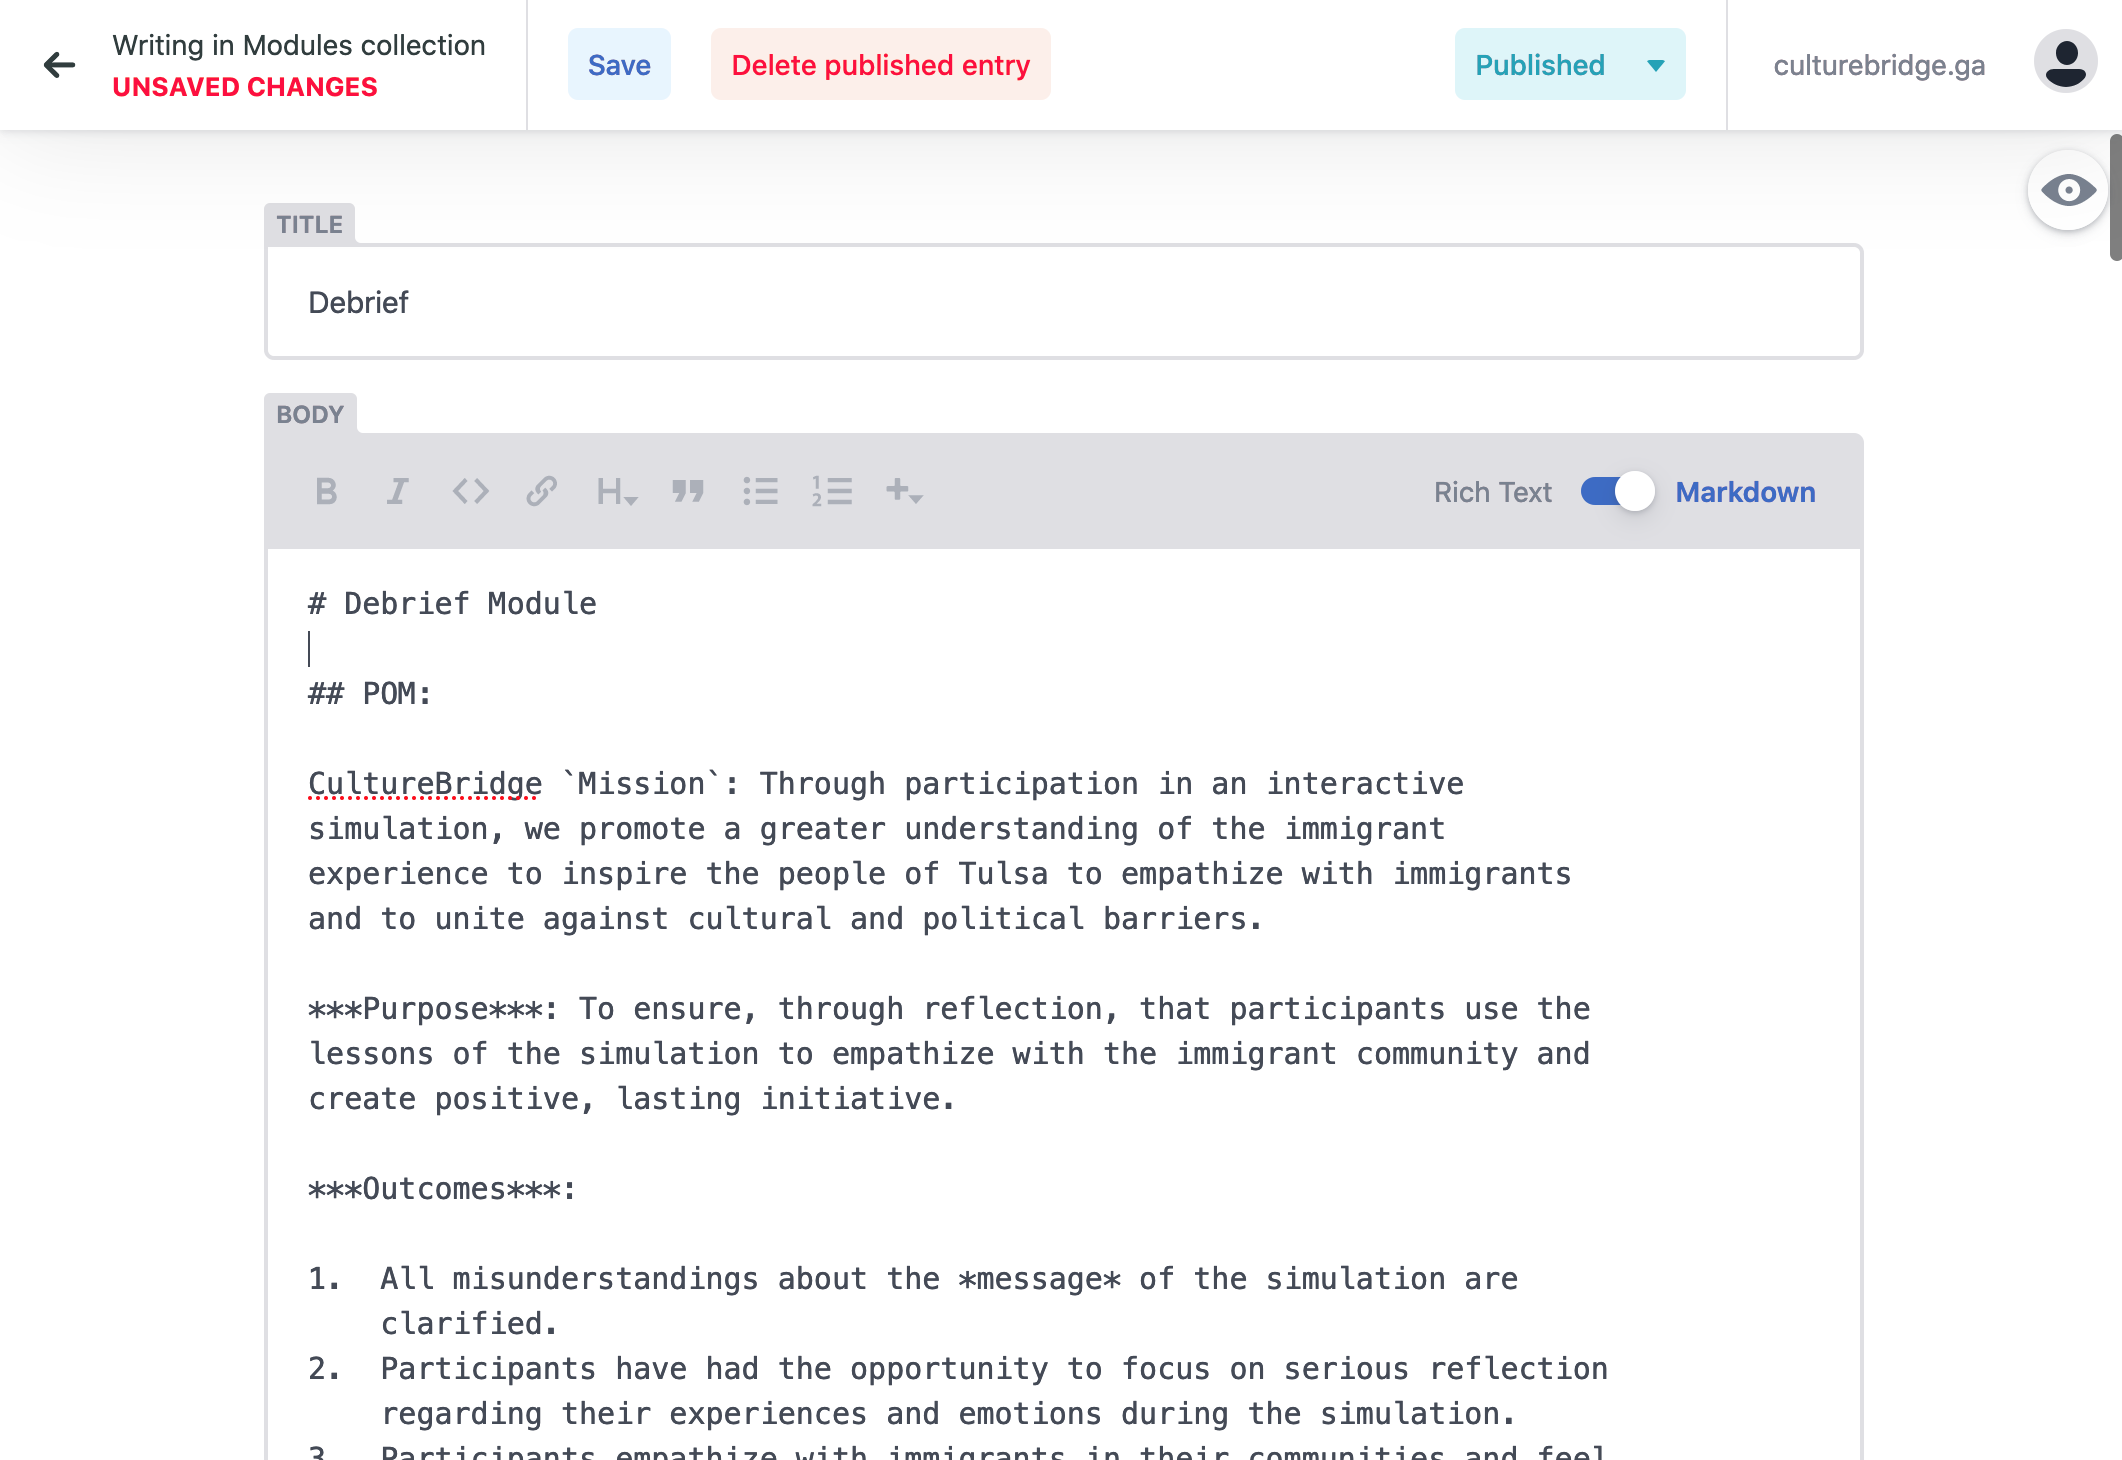
Markdown is a plain text “markup” language which allows you to type and focus on the content while still considering formatting. To learn markdown (and I encourage you to!), read the Markdown section.
Scroll down to the bottom of the page until you see something like this:
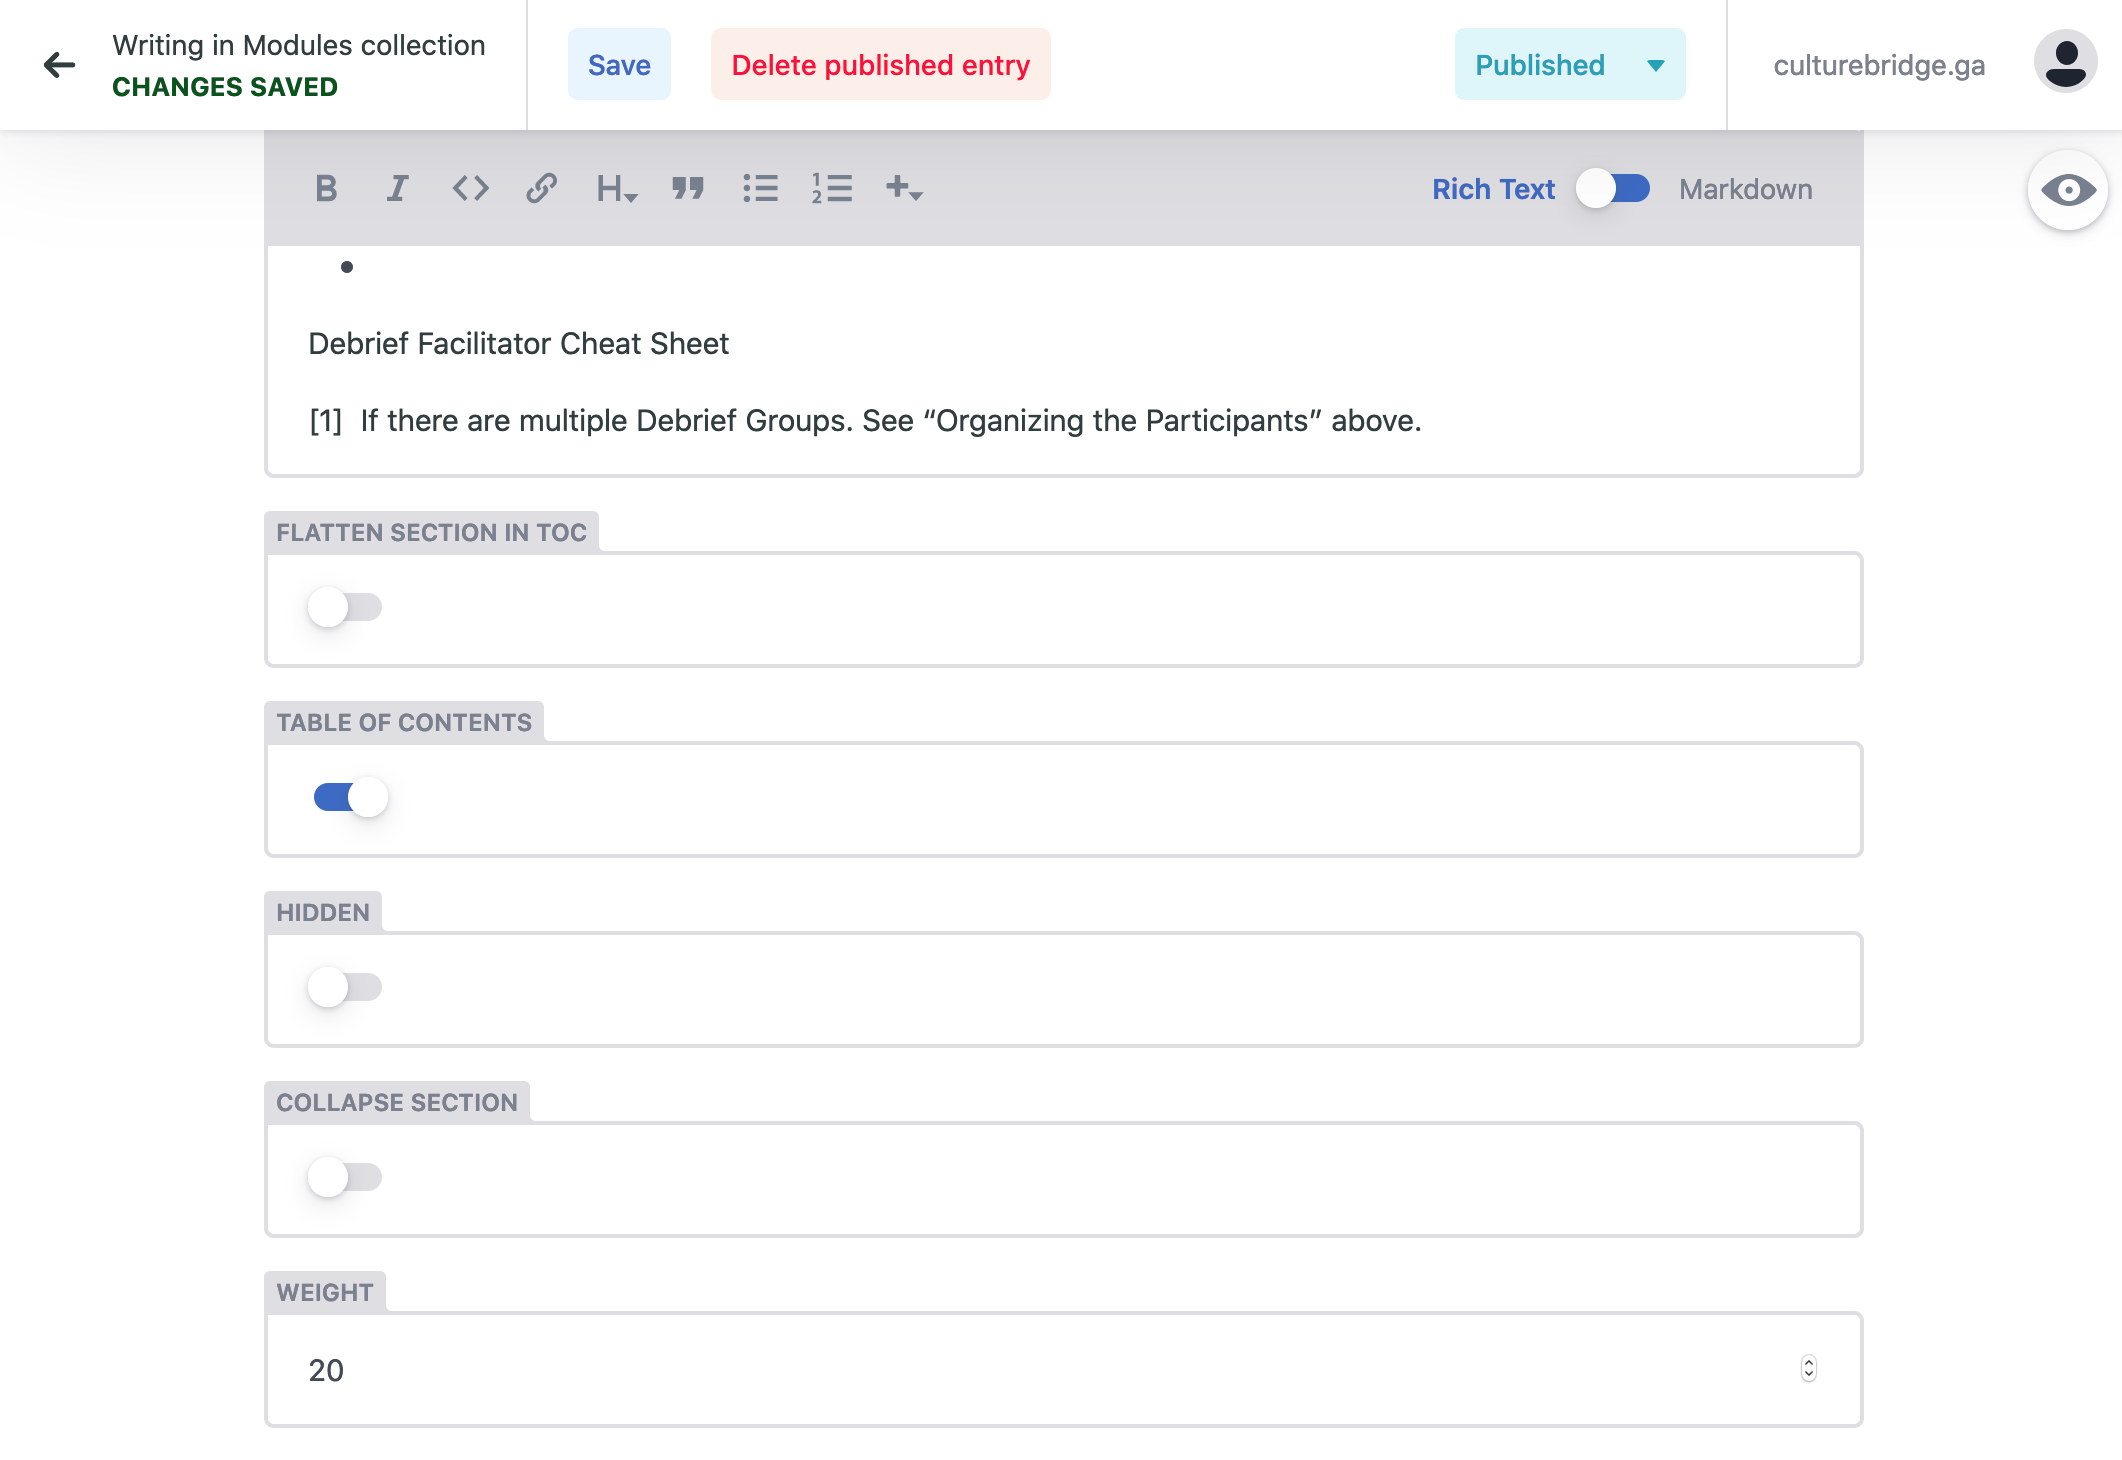
Let’s go through each of these settings:
- Flatten Section in TOC: makes this page one of the left-most pages in the Menu (you probably won’t use this).
- Table of Contents: enables or disables the TOC. If it’s a simple page without many headers, disable it. Otherwise, enable it.
- Hidden: when toggled, hides the page from the Menu.
- Collapse section: collapses sub-pages, like the Activities and Stories section.
- Weight: The lowest numbers appear first in the Menu. The highest numbers are last.
creating a page
To create a page, first go to the proper section. Then, click the “New …". An empty new page will appear for you to edit. Fill out the Title (this is what will appear in the TOC), then set the proper settings. Put the content in the Body section.
saving
When you are done with a new post or editing an existing one, be sure to click Save (DON’T SAVE YOUR TEST POST PLEASE). Once you do, you’ll see some more info on the top:
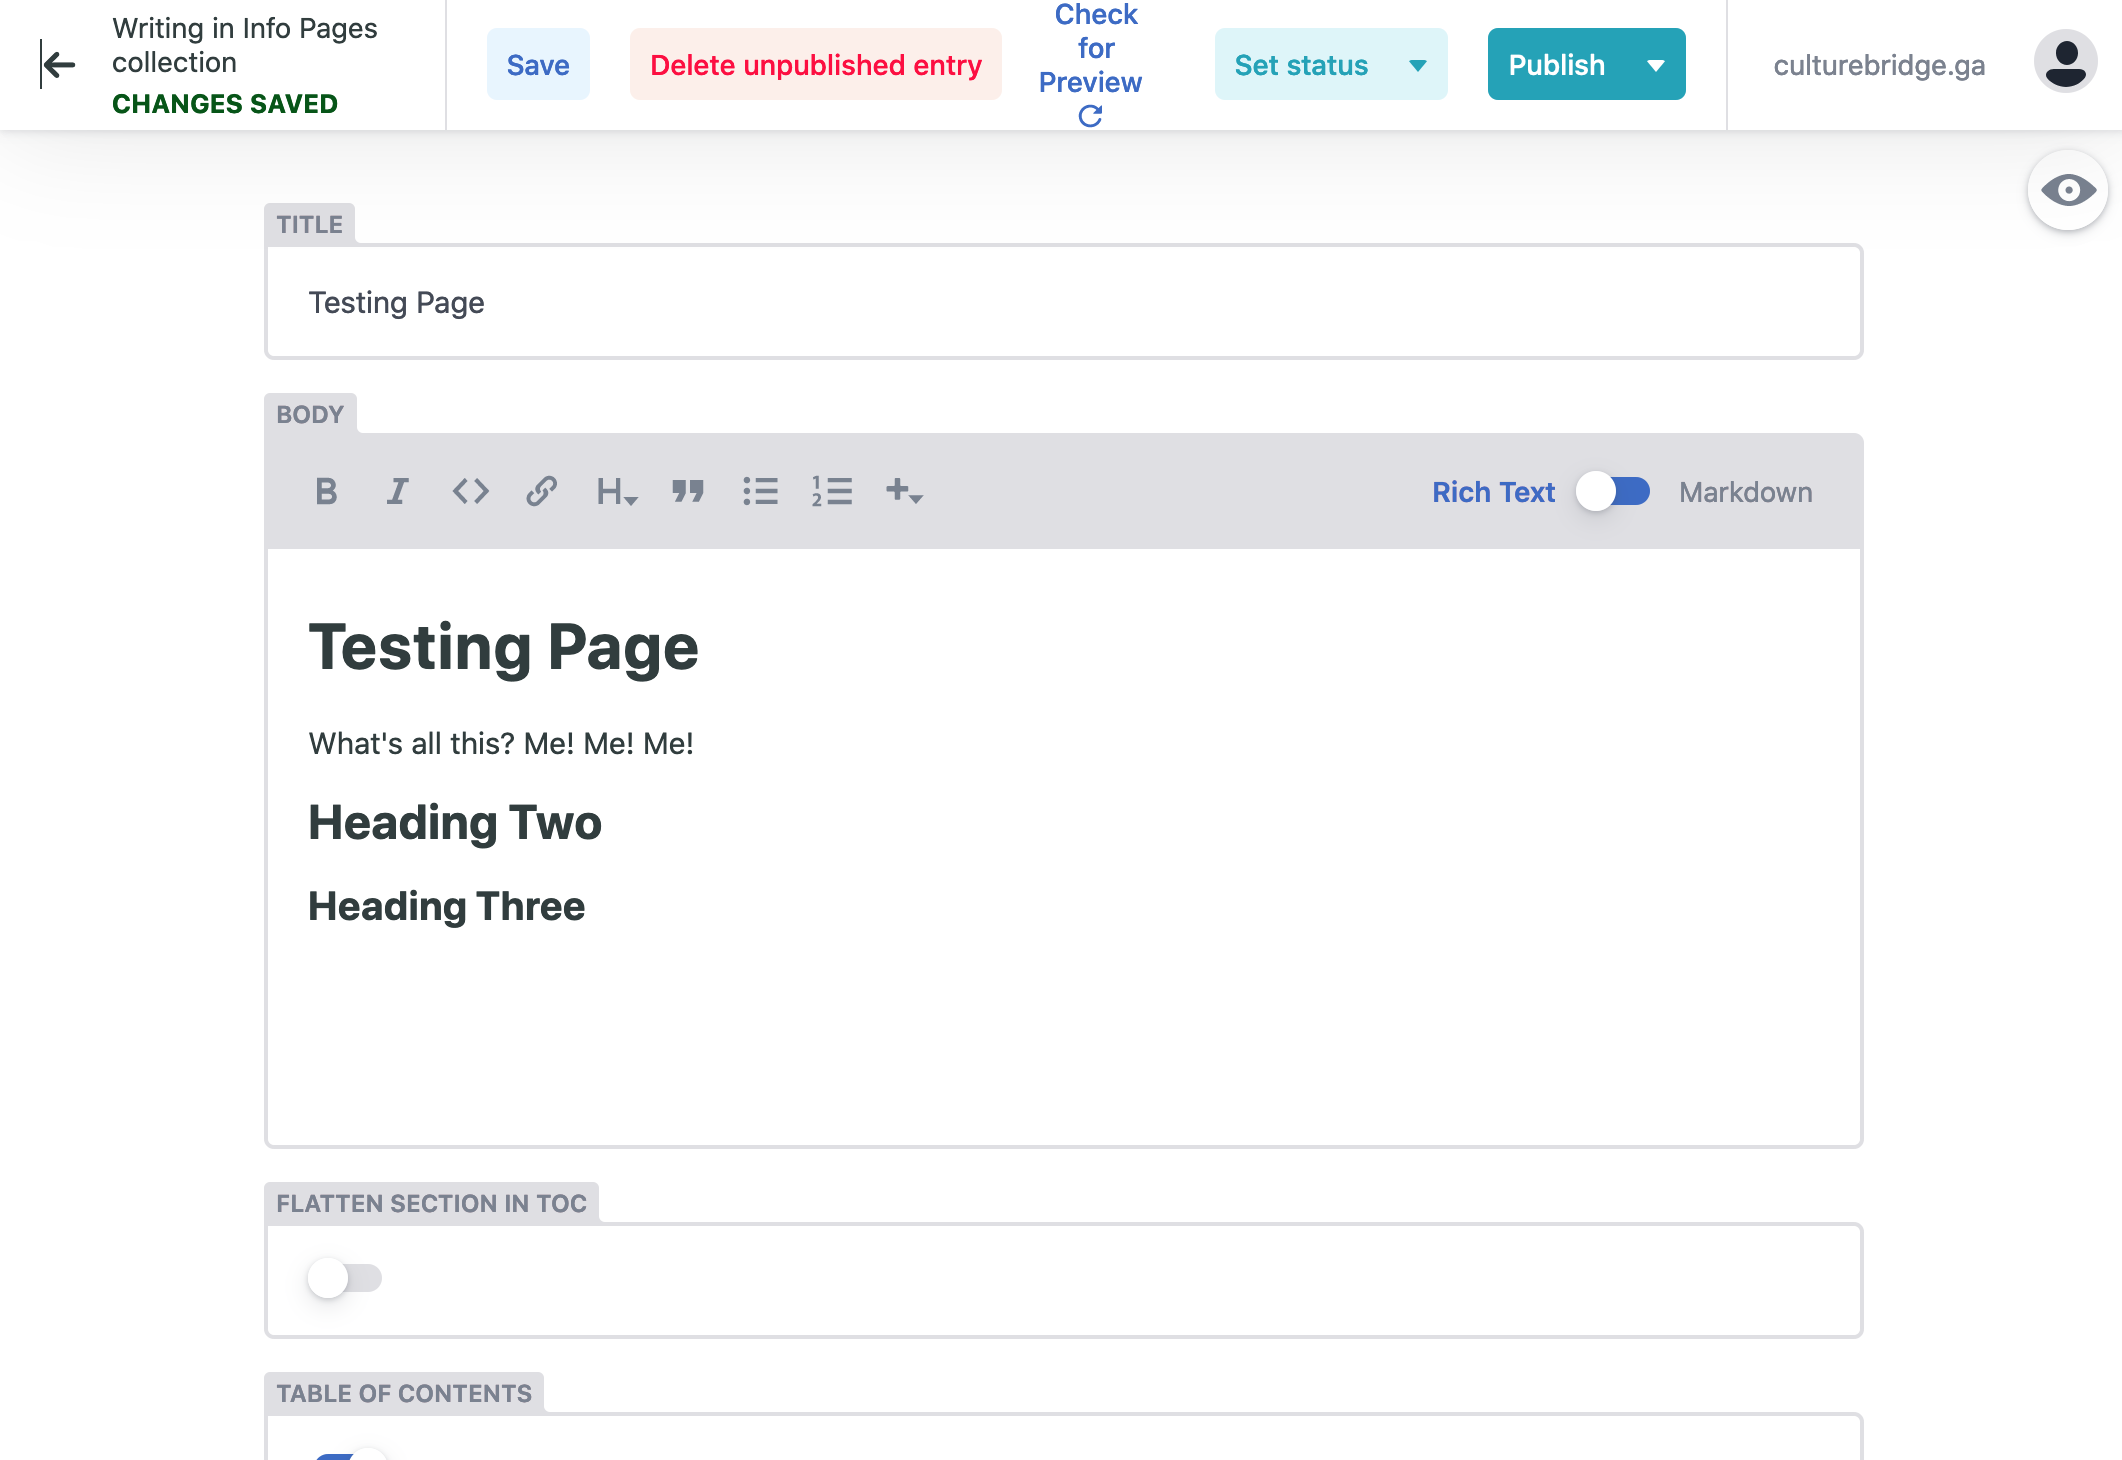
Let’s go through it:
- “Delete Unpublished Entry”: Deletes the post, duh.
- “Check for Preview”: this is one of the coolest features of our platform. When you create a draft and save it, our system automatically creates a Preview site within a minute or two. Click this, and eventually “View Preview” will appear. Click this will open a new tab with the full preview site.
- “Set Status”: Netlify includes an editorial management system. When you create or edit content, it will be entered as a draft. When you are ready for it to be reviewed, you can set it as “In Review”. Eventually a designated editor will come and mark it as “Ready” when they have checked over it and it is ready for publishing to the site. Nate will take care of the final publishing to the site until we are all more familiar with the system.
- “Publish”: Don’t use this :)
editorial workflow
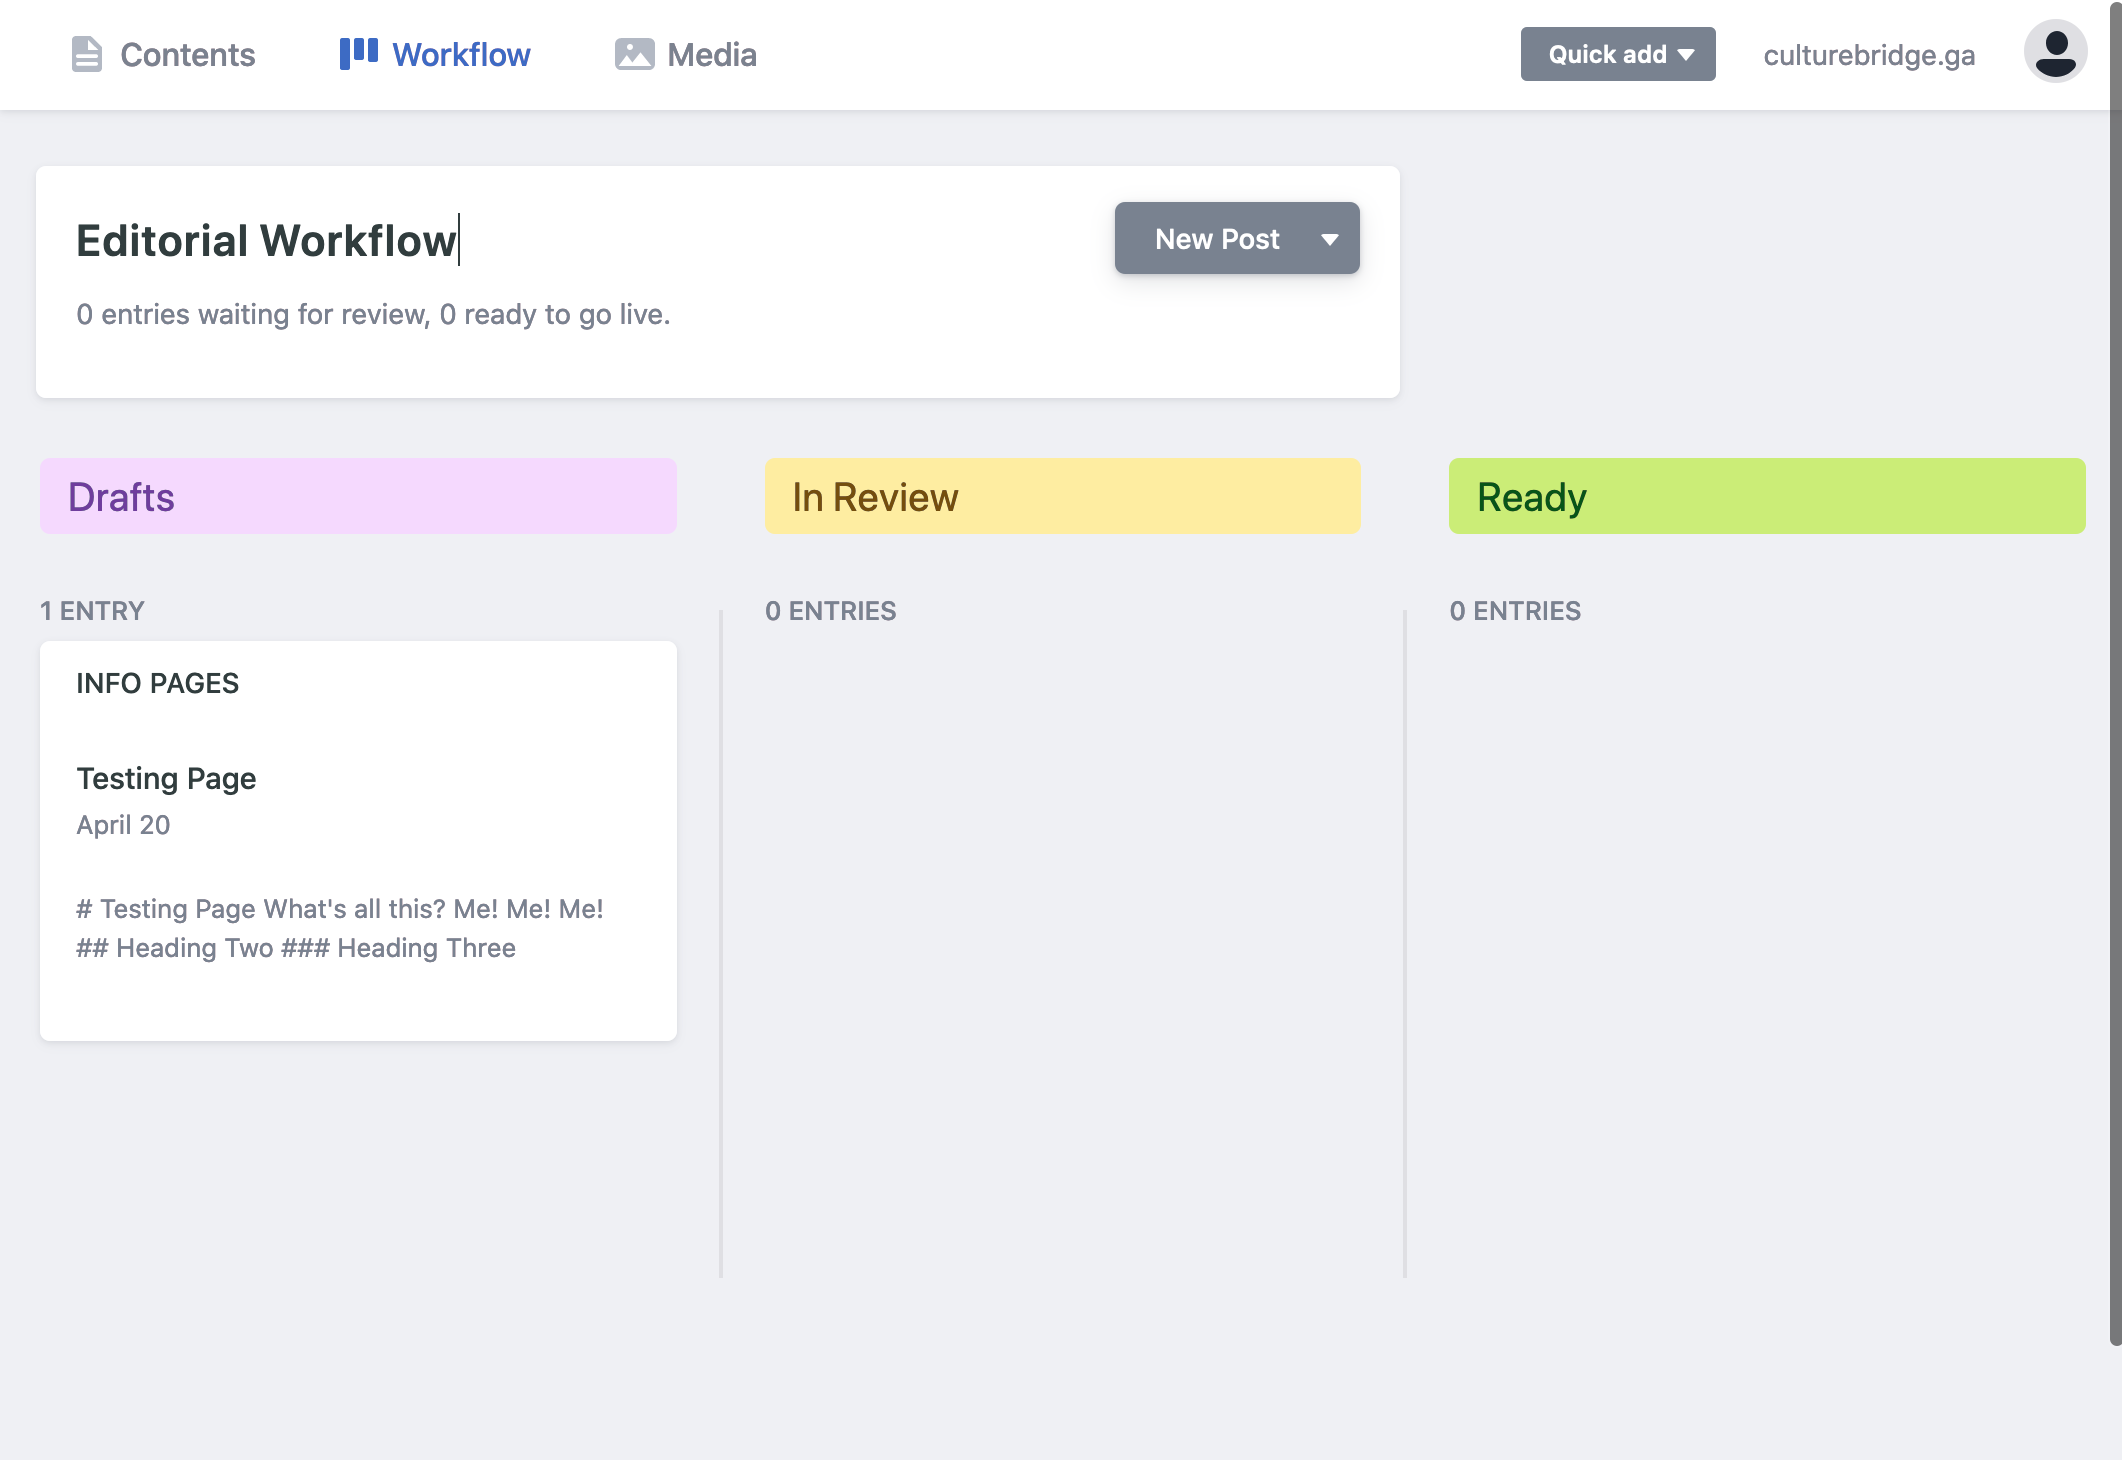
Shows the Editorial Workflow described above.
images and files
You can embed images in your posts using the Rich Text editor. Your files will be uploaded to the server. The “Media” tab shows you everything uploaded thus far.
Coming soon: the ability to add files as attachments to pages. This will be helpful for attaching specific copies of certain information (e.g. on a Story page, we can include a PDF of the story that is properly formatted for printing, laminating, and cutting).
limitations
Important! Only have one person edit a page at a time.
contact me
Have questions? Just contact me!
markdown
There are some awesome guides on the internet. Here is a great one:
https://github.com/adam-p/markdown-here/wiki/Markdown-Cheatsheet
Markdown is the source content of every page on our site. When you write in the Rich Text editor, it is writing markdown in the background. Markdown is then taken by our system (see Hugo below) and formatted into HTML with the templates and CSS we take from our site theme and custom code I’ve written.
rich text vs. markdown on netlify
Most of everything you need can be written in the Rich Text editor. But there are some exceptions. When you want to use these awesome features, you need to change over to markdown mode.
supported features in the rich text editor
- Bold & Italics
- Headers (H1 to H6)
- Links
- Quotes
- Unordered lists (i.e. bullet points)
- Ordered lists (i.e. numbered points)
- Images
- Code (in-line)
- Code (block)
features which require markdown
tables
Tables might be needed. Here is an example:
| **Head box** | Content here |
| --- | --- |
| Name | Nate Ijams |
| Age | 18 |
| Coolness level | 1000 |
| Nickname | *The Great* |
| Website | [ijams.tk](https://ijams.tk) |
| Head box | Content here |
|---|---|
| Name | Nate Ijams |
| Age | 18 |
| Coolness level | 1000 |
| Nickname | The Great |
| Website | ijams.tk |
horizontal lines
Lines might be needed to split up content! A haiku split:
The west wind whispered,

---

And touched the eyelids of spring:

***

Her eyes, Primroses.

___
The west wind whispered,
And touched the eyelids of spring:
Her eyes, Primroses.
Remember, with all markdown content, it’s important that you put an empty line between things. You can use *** or ___ or ---. All of them work!
footnotes
This is important information[^1].

This is also important, but it is second[^2].
This is important information1.
This is also important, but it is second2.
But note, at the bottom of your page, you need to add something like this:
[^1]: Here is a disclaimer about some complication.

[^2]: Here is a reference: google.com.
A line will automatically be inserted before the footnotes section.
hints
You make it like this:
{{< hint "info" >}}
**This is a hint**, which is highlighted beautifully.
You can make it blue with "info", yellow with "warning",
and red with "danger".
{{< /hint >}}
This is a hint which is highlighted beautifully. You can make it blue with “info”, yellow with “warning”, and red with “danger”.
This is a hint which is highlighted beautifully. You can make it blue with “info”, yellow with “warning”, and red with “danger”.
This is a hint which is highlighted beautifully. You can make it blue with “info”, yellow with “warning”, and red with “danger”.
buttons
Go Home Be Happy{{< button relref="/" >}}Go Home{{< /button >}}
{{< button href="https://lmgtfy.com/?q=puppies&t=i" >}}Be Happy{{< /button >}}
columns
Japanese
初しぐれ猿も小蓑をほしげ也
はつしぐれさるもこみのをほしげなり
English
the first cold shower
even the monkey seems to want
a little coat of straw
{{< columns >}} <!-- begin columns block -->
# Japanese

初しぐれ猿も小蓑をほしげ也

はつしぐれさるもこみのをほしげなり

<---> <!-- magic sparator, between columns -->

# English

the first cold shower

even the monkey seems to want

a little coat of straw
{{< /columns >}}
expand
{{< expand "don't click here" >}}
GOSH DANG. I SAID **DON'T**.
{{< /expand >}}
katex
\(f(x) = \int_{-\infty}^\infty\hat f(\xi)\,e^{2 \pi i \xi x}\,d\xi\){{< katex "[display]" "[class="text-center"]" >}}
f(x) = \int_{-\infty}^\infty\hat f(\xi)\,e^{2 \pi i \xi x}\,d\xi
{{< /katex >}}
tabs
Puppies
They are cute. You probably aren’t.
Honesty has rewards
I am really proud of you for clicking on this tab. Honesty has many rewards. Most of all, be honest with yourself.
Ego is bad
Wow. Just wow. Get over yourself.
{{< tabs "people" >}}
{{< tab "Non-People" >}}
## Puppies

They are cute. You probably aren't.

{{< /tab >}}
{{< tab "Dumb People" >}}
## Honesty has rewards

I am really proud of you for clicking on this tab. Honesty has many rewards. Most of all, be honest with *yourself*.
{{< /tab >}}
{{< tab "Smart People" >}}
## Ego is bad

Wow. Just wow. Get over yourself.
{{< /tab >}}
{{< /tabs >}}
Where I put people in the {{< tabs "people" >}} above, you need to put a unique id. For example, you can’t have two Tab things on one page which both have the ID “people”. One might be “people” and the other “manual-explanation”.
must I use markdown?
Maybe not! And you certainly aren’t required to put all these fancy things (tabs, hints, columns, buttons). But you probably will need to use tables, footnotes, and horizontal lines at some point.
Netlify (not the CMS)
Netlify is the service we are using for hosting, site deployment, and more. This is separate (but related to Netlify CMS). It allows us to build the site automatically when changes are pushed to our Git repository. See the git section.
Hugo
Hugo is the wonderful static site generator that we are using. In essence, this is how it all works:
- We write content (in the end, this is in markdown).
- We gather/create templates: these are written in HTML, CSS, and Go.
- Hugo takes the content we have and essentially puts everything together with the templates. In the end, it outputs a static site. That is, a folder which contains everything that the website contains, from a home page (index.html) to each photo. You could browse this on your computer, or have a web server serve the files to visitors. This is in contrast to a dynamic site which generates the content then sends it to your computer every time you visit the page.
Hugo is well-know, well-supported, and extensible. I use it for my school newspaper site, my personal site, my school’s tutoring site, and event sites.
git
Git is a version control system. It is used widely in the development/programming world. It (or other SCM software like Mercurial) is used literally everywhere. It’s just one of those essential tools you have to learn. This site is tracked and held in a Git repository. See it at https://gitlab.com/exprez135/culturebridge-hugo/. This can be used to develop new features, keep track of the project history, restore to a previous version, etc. Too many features to count. Resources:
If you want, you can make a GitLab account and directly clone and work with the repository. Or, just check it out to read the source code. Notice that the end of each page has “Edit this page”. That will take you to a direct online editor in the repository, but you’ll have to be signed in to use it! You could even suggest changes, edits, and clarifications to this document!